Petalbud

Web App

This project is a creative implementation of the bit masking principle in a dynamic web design using React and Next.js. The core idea behind the design is to visually represent different characters (in this case, forest spirits) based on user input, specifically using bitmasking to determine which images (representing the spirits) will appear.

Petalbud Banner

Timeline

3 Days

Tools

Adobe Photoshop, Procreate, Next.js, GitHub

DESIGN RATIONALE

The concept of this project centers around bit masking to dynamically reveal forest spirits (Petalbuds) based on user input. The objective is to create an interactive, visually engaging experience where the user's actions control the progression of a small, mystical story. Through this principle, users unlock different spirits, each representing an element of the narrative.

This project allowed me to combine interests in storyboarding, animation, and concept art to craft an original small story. The narrative follows Lumina, who discovers a hidden realm full of forest spirits called Petalbuds. A curious baby Petalbud spirit named Bloom emerges and captures the hearts of the spirits. As Lumina and Bloom form a bond, other Petalbuds reveal their luminescent selves. The interactive design enables users to engage with the story, adding depth and creativity through dynamic content.

Live Project

Explore and interact with the Petalbud webapp by clicking the button below.

DESIGN CONCEPT

Style Guide

PAINTING PROCESS

Watch the speedpaint of Petalbud, showcasing the creation of the mystical forest background and characters. This video captures the artistic process of bringing the enchanting world and its spirits to life.

PROJECT LOGIC

1. Initialize Data

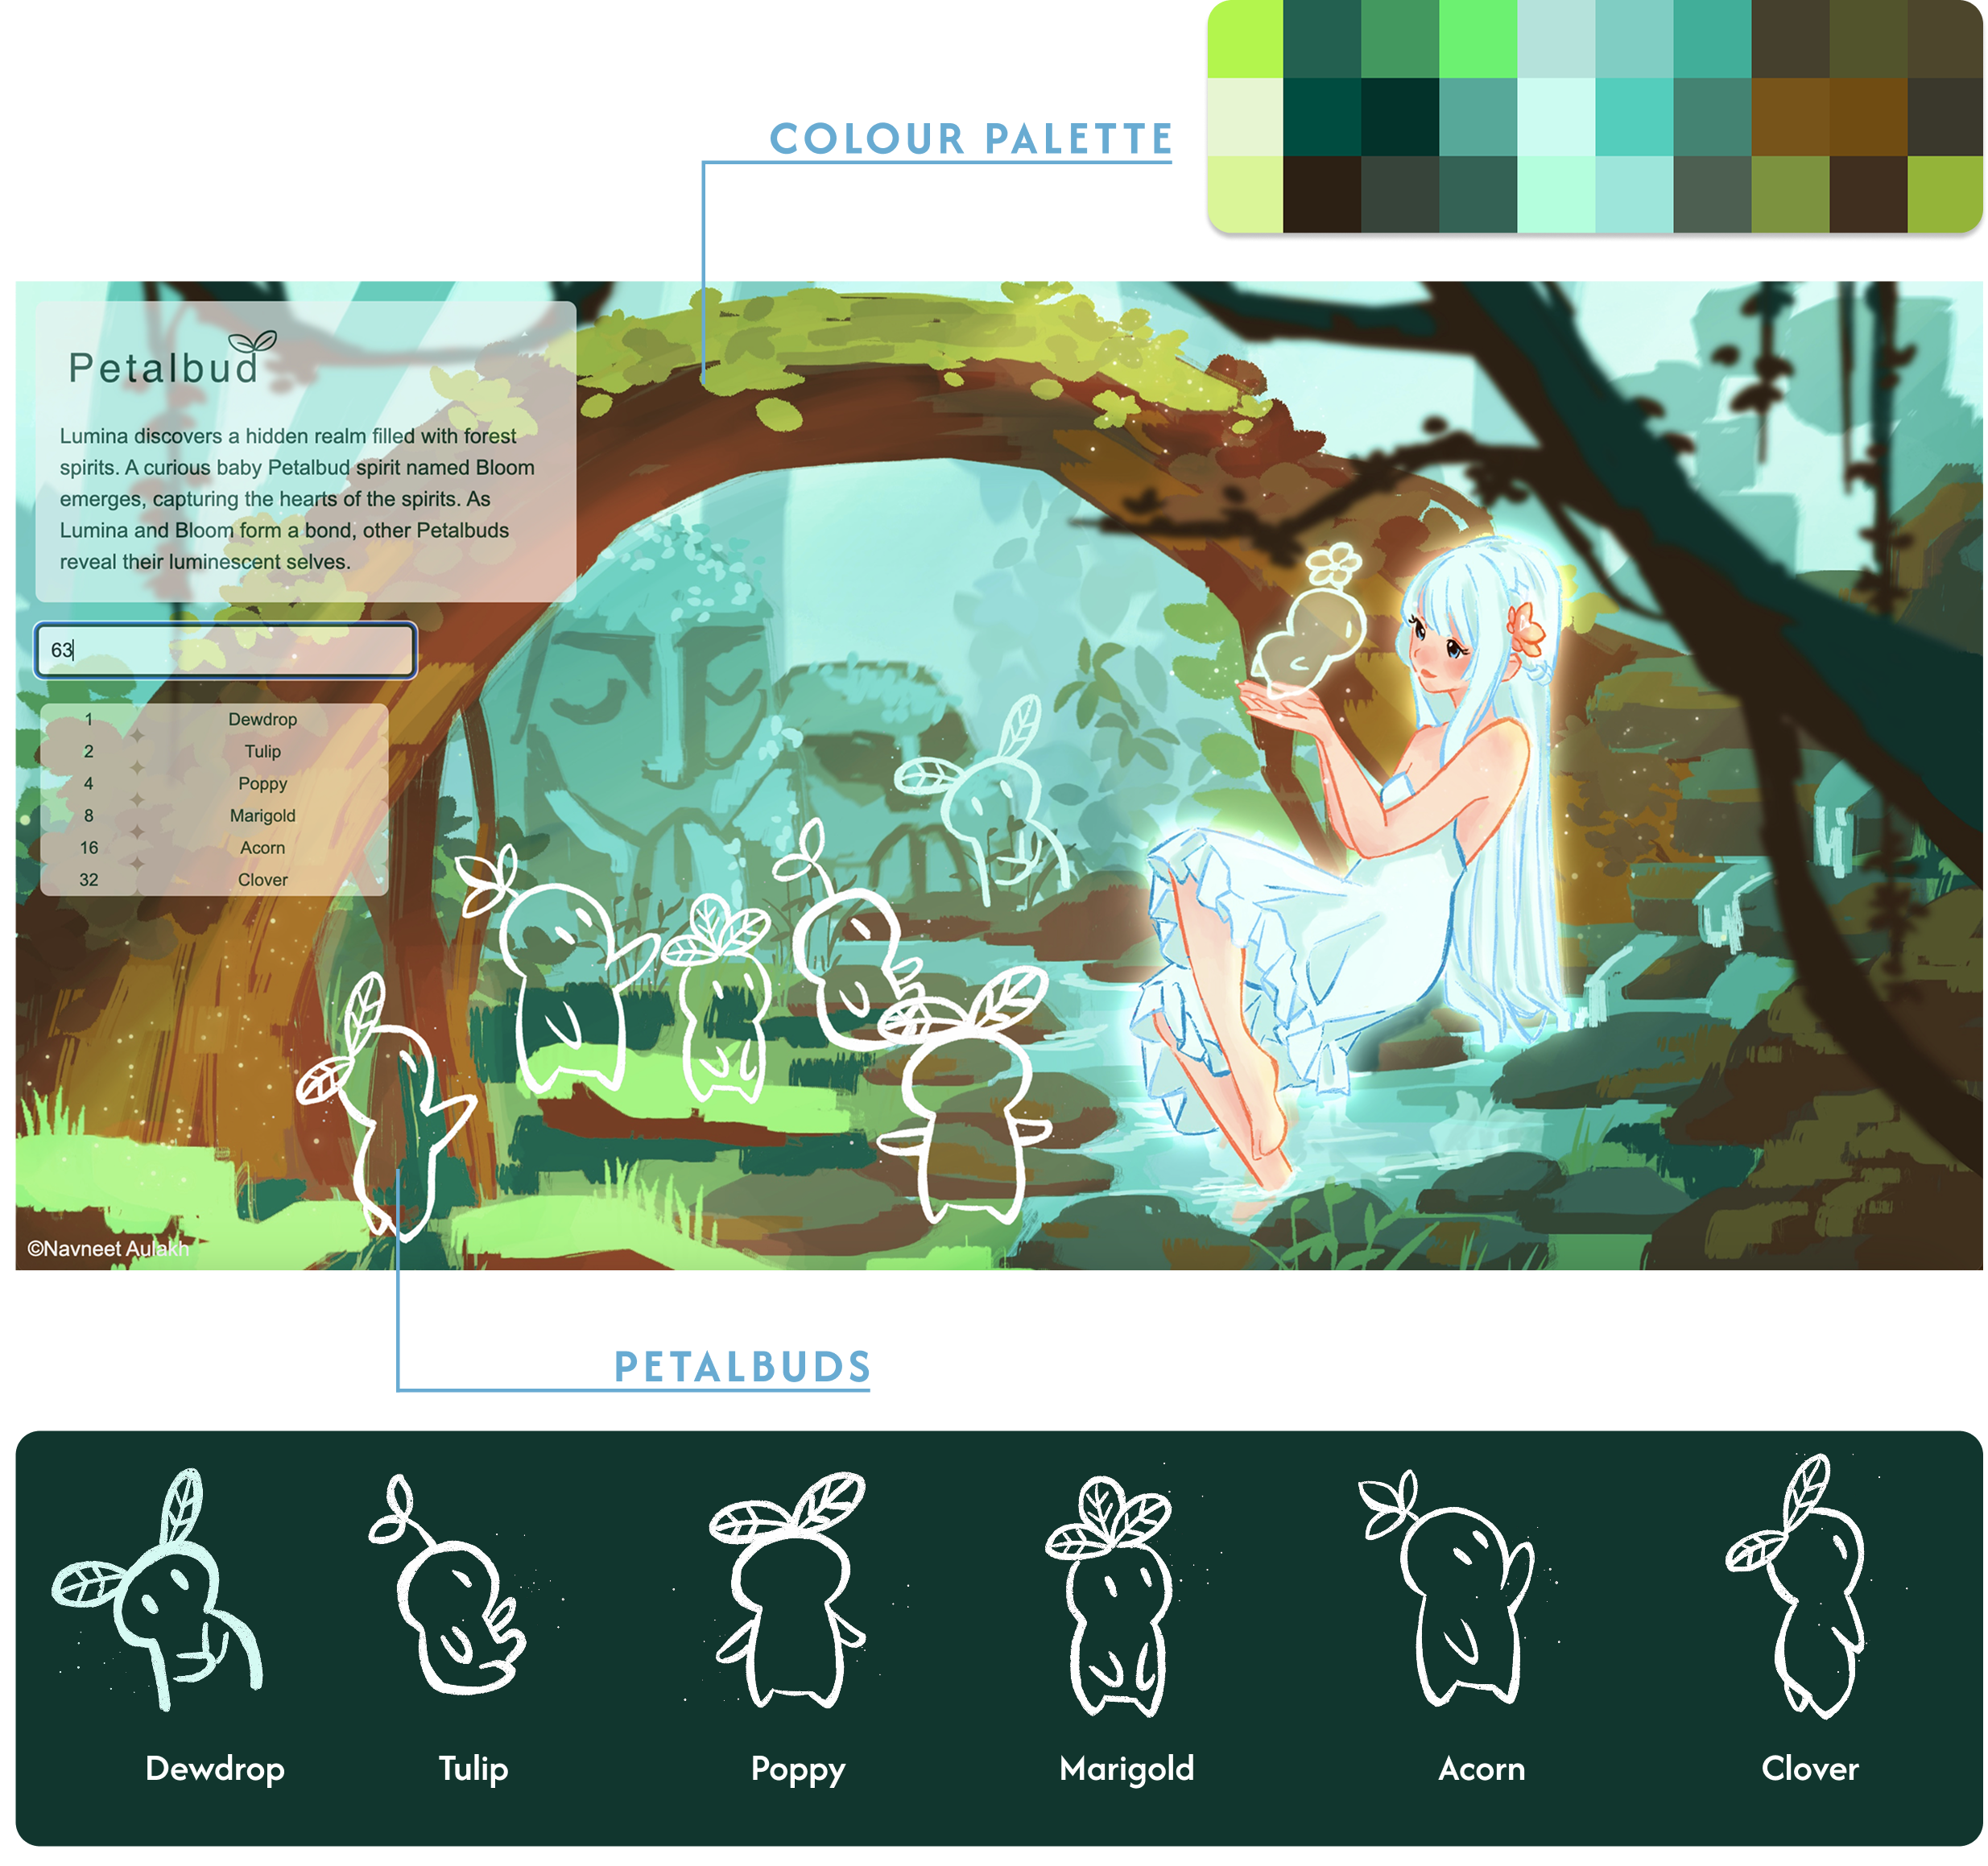
Define spirit classes and their images, positions, and sizes in JavaScript objects. Each class has a bit value that corresponds to a spirit class (e.g., Dewdrop = 1, Tulip = 2).


const classImages = { 1: { src: '/images/1.gif', width: 250, height: 250 }, ... };
const classFilters = { 1: 'Dewdrop', 2: 'Tulip', ... };
                    

2. Capture User Input

The user enters a number in the input field, which is then stored as the `input` state. This number will control which spirits appear based on their corresponding bit values.


const [input, setInput] = useState(""); 


3. Bitmasking

The input is processed using bitwise operations. This helps determine which spirit images should be displayed based on which bits are set in the input.


const selectedImageKeys = Object.keys(classFilters).filter(key => (input & parseInt(key)) > 0);
                    

4. Render Images

For each matching bit, corresponding images are dynamically displayed. The images are positioned based on the data stored in `classImages`.


return selectedImageKeys.map(key => {
    const selectedImage = classImages[key];
    return ();
});
                    

5. Display Spirit Information

A table is shown that links each bit value to a spirit class name (e.g., 1 = Dewdrop). This helps users understand which input reveals which spirits.


{Object.keys(classFilters).map(item => (
    {item}{classFilters[item]}
))}
                    

6. Styling and Responsiveness

CSS is used to style the images, and make the user interface visually appealing with features like hover effects and flexbox for layout.


.steps-container { display: grid; grid-template-columns: repeat(auto-fill, minmax(280px, 1fr)); }
.step-box:hover { transform: translateY(-10px); box-shadow: 0 6px 12px rgba(0, 0, 0, 0.15); }